Creativity in every click.

Category: Photography

Samsung

7 Reasons Why Mobile Photography Is Better Than You Think

Mobile Photography: Is It Really That Good?

Yes, mobile photography is that good and getting better every year. Thanks to powerful cameras built right into smartphones, many professional photographers now rely on their phones for a surprising range of work. From quick Instagram reels to full wedding shoots, mobile devices are proving they can capture stunning, high-quality images that rival traditional cameras. But mobile photography isn’t just for pros—it’s for everyone. Whether you’re a beginner snapping casual shots or an enthusiast wanting to improve, your phone opens up endless creative possibilities. In this post, we’ll explore why snapping pictures with your phone is far more than just a quick hobby — it’s a serious tool for storytelling, creativity, and sharing your unique perspective with the world.

Benefits of Mobile Photography

Mobile photography isn’t just convenient—it’s powerful. Here’s why:

  • Always with you: Your phone is always in your pocket, ready to capture the moment.
  • High-quality cameras: Modern smartphones come with advanced lenses, AI, and night mode.
  • Easy to share: Snap, edit, and post in minutes—no need for SD cards or transfers.

You don’t need fancy gear to be a great photographer. All you need is your mobile photography skills and a creative spark.

Editing Apps That Improve Your Shots

Editing is half the fun. Try these free apps to take your mobile photos to the next level:

  • Snapseed (by Google): Great for quick edits and filters.
  • Lightroom Mobile: For more control over exposure, contrast, and tone.
  • VSCO: Known for beautiful, subtle filters.
  • Canva: Perfect for adding text or making graphics.

💡 Pro Tip: Start with brightness and contrast, then fine-tune your colors. Most editing apps let you save your presets too!

Best Times of Day to Shoot Outdoors

Lighting can make or break your photo. For mobile photography, natural light is your best friend.

  • Golden Hour: Just after sunrise or before sunset. Soft and warm tones = magic.
  • Overcast Days: Great for even lighting—no harsh shadows.
  • Avoid Noon Sun: Too bright and harsh, especially for phone lenses.

Remember: Your phone camera works best in soft light.

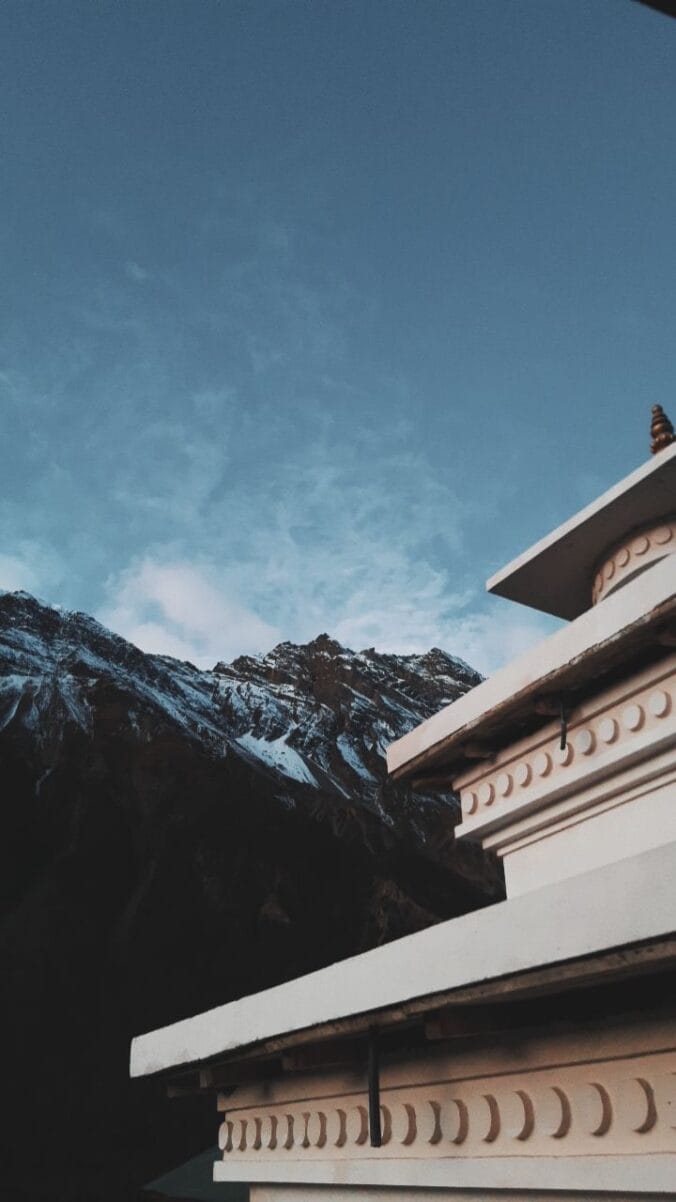
How I Captured My Favorite Shot with Just a Phone

One chilly morning in Khangsar, I woke up early to catch the sunrise. The golden light slowly poured over the snowy peaks and quiet trails—it was breathtaking.

I didn’t have a fancy camera, just my Android phone. No tripod, no filters—just steady hands and a bit of patience. After snapping the shot, I used Snapseed to enhance the colors and bring out the morning glow.

It didn’t go viral, but it became one of my most loved photos. It reminded me that mobile photography is more about feeling the moment than chasing likes.

Bonus Tips for Beginners

OPPO A5

If you’re new to mobile photography, start here:

  • Clean your lens: Sounds obvious, but smudges ruin sharpness.
  • Use grid lines: Helps you follow the Rule of Thirds.
  • Tap to focus: Don’t let your camera auto-guess.
  • Try different angles: Low shots, overhead shots, reflections all work great on phones.
  • Use burst mode: Especially helpful when photographing movement.

Conclusion

You don’t need a fancy DSLR to create powerful art. Mobile photography lets you explore creativity right from your pocket. With the right light, a few clever apps, and a curious eye, you can capture moments that speak louder than megapixels.

So what are you waiting for? Grab your phone and go chase the light!

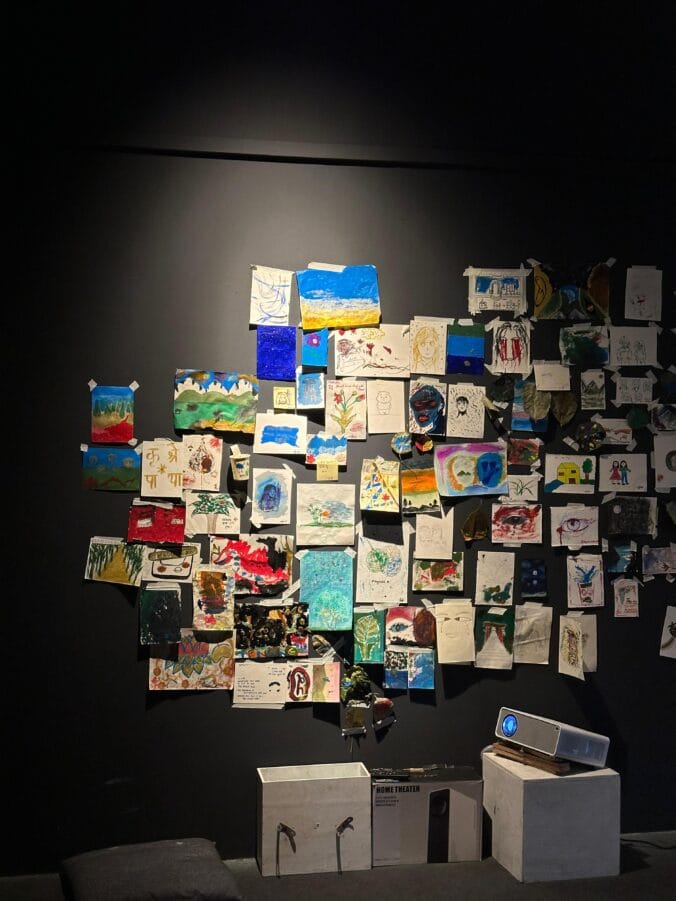
If you want to see the photo gallery I built on my website, click here. It includes all my favourite mobile photos, too!

Want more editing help? Check out these:

7 Powerful Steps to Build Website Photo Gallery That Impresses

If you want to build website photo gallery that truly shines, you’ve come to the right place! A well-designed photo gallery on your website not only showcases your best shots but also tells your story visually. Whether you’re a photographer, artist, or small business owner, a great gallery is a must-have.

Using WordPress makes this task super easy even if you don’t have coding skills. In this post, I’ll walk you through 7 powerful steps to build website photo gallery that looks stunning, loads fast, and works perfectly on phones and tablets.

Ready? Let’s get started!

The first step to building a beautiful photo gallery is picking a WordPress theme that makes your images pop.

Look for themes that:

  • Are lightweight and fast
  • Offer gallery-friendly layouts like grids or masonry styles
  • Are mobile responsive
  • Allow easy customization without coding

My favorites are AstraOceanWP, and Neve because they balance speed and style perfectly. These themes work seamlessly with popular gallery plugins too.

Want more? Check out WordPress Themes for Photographers.

Next, you need a gallery plugin to organize and showcase your photos professionally. Two popular options to help you build website photo gallery are:

  • Envira Gallery: Drag-and-drop builder, pre-made templates, and excellent mobile support.
  • FooGallery: Offers both free and premium versions, plus great customization options.

These plugins let you create albums, add lightbox effects, and speed up loading with lazy loading.

If you want to explore other options, WP Beginner’s list of best WordPress gallery plugins is a helpful resource.

Step 3: Upload and Organize Your Photos

OPPO A5

A gallery is only as good as its photos—and how well they’re organized!

  • Upload high-quality images but optimize them for web (use tools like TinyPNG).
  • Organize photos into albums or categories like portraits, landscapes, or events.
  • Use descriptive file names and add alt text including your focus keyword build website photo gallery for better SEO.

Example alt text:
“build website photo gallery example of nature photography”

A clean, well-structured gallery boosts your site’s professionalism and brand story. Curious how design shapes visuals? Check out what a graphic designer does for a quick insight.

Most people browse on phones, so your gallery must look great everywhere. Good news: most modern WordPress themes and gallery plugins are mobile responsive by default.

Still, don’t forget to:

  • Test your gallery on various devices and screen sizes
  • Use Google’s Mobile-Friendly Test to check performance
  • Customize mobile layouts if your plugin allows (Envira does!)

Step 5: Add Captions and SEO-Friendly Details

Captions are your gallery’s storytellers. Adding brief, interesting captions helps visitors understand the photo’s context.

Also, add SEO-friendly details:

  • Use your focus keyword naturally in captions and image alt text
  • Add titles and descriptions to images when possible

This boosts your gallery’s visibility on search engines and helps attract more visitors.

Step 6: Boost User Engagement with Social Sharing

Make it easy for visitors to share your work on social media. Most gallery plugins support social sharing buttons.

Encourage visitors to:

  • Share their favorite photos
  • Follow you on social platforms
  • Contact you through your site for inquiries

Engagement means more visibility and potential clients!

Speed is crucial for user experience and SEO. Here’s how to keep your gallery lightning fast:

  • Compress images without losing quality (use tools like TinyPNG)
  • Use lazy loading to load images only when needed
  • Choose a fast hosting provider
  • Limit the number of images per page to avoid slowdowns

A fast gallery keeps visitors happy and boosts your Google ranking.

Conclusion

To build website photo gallery that wows visitors, focus on choosing the right theme, using powerful plugins, organizing photos well, and optimizing for mobile and SEO. With these 7 steps, you’ll have a stunning, fast, and professional gallery up and running in no time.

Ready to get started? Your beautiful photo gallery awaits!

5 Essential Beginner Photography Tips You’ll Love

You don’t need a fancy camera to take great photos. Whether you’re using a smartphone or a DSLR, understanding a few essential tips can dramatically improve your photography. These beginner photography tips will help you take stunning pictures no matter your device.Keep reading to learn how simple changes can make a huge difference!

1. Use Natural Light: Beginner Photography Tips

One of the most important beginner photography tips is to use natural light. Lighting is everything in photography it shapes your subject, sets the mood, and influences the colours. The best light usually comes from the sun, not your camera’s flash.

  • Shoot during golden hour: Early morning or late afternoon light is softer and warmer. Avoid harsh midday sun that creates strong shadows.
  • Avoid direct overhead light: It can cause harsh shadows on faces.
  • Use window light indoors: Stand near a window for soft, flattering light.
  • Experiment with backlighting: Place your subject in front of the light source to create a glowing outline.

By mastering natural light, you’ll make your photos look professional without any expensive gear.

2. Follow the Rule of Thirds

The rule of thirds is a fundamental photography composition technique that beginners should learn. Imagine your frame divided into nine equal sections by two vertical and two horizontal lines. Position your subject or points of interest along these lines or their intersections.

Why does this work?
It makes photos more balanced, interesting, and pleasing to the eye.

  • Many smartphone cameras and DSLRs have a grid overlay option—turn it on.
  • Place horizons on the top or bottom third line instead of dead center.
  • Put your subject’s eyes or key features at one of the four intersections.

Following this simple rule will immediately improve your photo compositions and help you capture more dynamic shots.

3. Keep Your Lens Clean

It sounds simple, but a dirty lens can ruin your photos. Dust, fingerprints, and smudges blur your images and reduce sharpness.

  • Regularly clean your lens with a microfiber cloth.
  • Avoid using your shirt or rough materials.
  • For smartphones, gently wipe the lens area before shooting.
  • Use a lens cleaning solution if necessary, but sparingly.

A clean lens ensures your photos are crisp, clear, and vibrant every time.

4. Focus on One Subject

Trying to include too many things in one photo can confuse the viewer. A strong photo usually has a clear subject.

  • Decide what your main focus is—whether a person, flower, or building.
  • Use your camera’s focus feature to lock on that subject.
  • Use a shallow depth of field (if your camera allows) to blur the background and make your subject stand out.
  • Frame your subject carefully to avoid distractions.

When your photo tells a clear story about one thing, it’s easier for viewers to connect with it.

5. Practice Every Day

OPPO A5

Photography is a skill that improves with practice. The more photos you take, the better you get.

  • Challenge yourself to take at least one photo every day.
  • Try different subjects, angles, and lighting.
  • Review your photos regularly to see what works.
  • Don’t be afraid to make mistakes that’s how you learn.

Remember, many great photographers started with simple cameras and daily practice.

Conclusion

Photography is about seeing the world differently. It’s not about having the most expensive equipment but learning how to use what you have creatively. Use natural light, apply the rule of thirds, keep your lens clean, focus on one subject, and most importantly, practice every day. With these 5 beginner photography tips, you’re ready to start your photography journey and capture stunning images that tell your story.

Ncell